If you’re looking for a seamless and reliable way to extend your Wi-Fi coverage at home or in the office, TP-Link Deco is an excellent choice. Setting up your TP-Link Deco system may seem daunting at first, but fear not! In this comprehensive step-by-step guide, we’ll walk you through the entire process, ensuring a hassle-free installation. So, let’s dive right in and get your TP-Link Deco up and running!
How to Set Up TP-Link Deco: Step by Step Guide
Setting up your TP-Link Deco system is a breeze when you follow these simple steps:
Step 1: Unboxing and Preparation
Before you begin the setup process, unbox your TP-Link Deco package and ensure that you have all the necessary components. The typical Deco package includes multiple Deco units, power adapters, Ethernet cables, and a user guide. Once you have everything ready, let’s move on to the next step.
Step 2: Connecting the Main Deco Unit
The main Deco unit acts as the primary router and should be connected to your modem. Follow these steps:
- Locate the modem in your home or office and power it on.
- Connect one end of the Ethernet cable to the LAN port on your modem.
- Take the other end of the Ethernet cable and connect it to the WAN port of the main Deco unit.
- Plug in the power adapter to the main Deco unit and connect it to a power source.
Step 3: Setting Up the Tp-link Deco Network
Now that the main Deco unit is connected, it’s time to set up Tp-link Deco network using the Deco app. Follow these instructions:
- Download and install the Deco app on your smartphone or tablet.
- Launch the Deco app and create a TP-Link ID if you don’t have one already.
- Log in to the Deco app using your TP-Link ID.
- Tap on the “+” button to add a new Deco device.
- Follow the on-screen instructions to configure the main Deco unit.
- Choose a network name (SSID) and password for your Deco network.
- Wait for the setup process to complete. The main Deco unit will restart during this time.
Step 4: Adding Additional Deco Units
To extend your Wi-Fi coverage, you can add more Deco units to your network. Here’s how:
- Connect the additional Deco unit to a power source.
- Launch the Deco app and tap on the “+” button to add a new device.
- Follow the on-screen instructions to configure the additional Deco unit.
- Choose the same network name and password as your main Deco unit.
- Position the additional Deco unit in an optimal location, ensuring good signal strength and coverage.
- Repeat these steps for each additional Deco unit you want to add.
Step 5: Testing and Optimization
With all the Deco units set up, it’s time to test your network and optimize its performance. Here are a few tips:
- Use the Deco app to perform a speed test and check your network’s performance.
- Adjust the placement of your Deco units for optimal coverage.
- Enable features like Smart Roaming and QoS (Quality of Service) to enhance your network experience.
- Connect your devices to the Deco network and enjoy seamless Wi-Fi throughout your home or office.
How to Reset TP-Link Deco
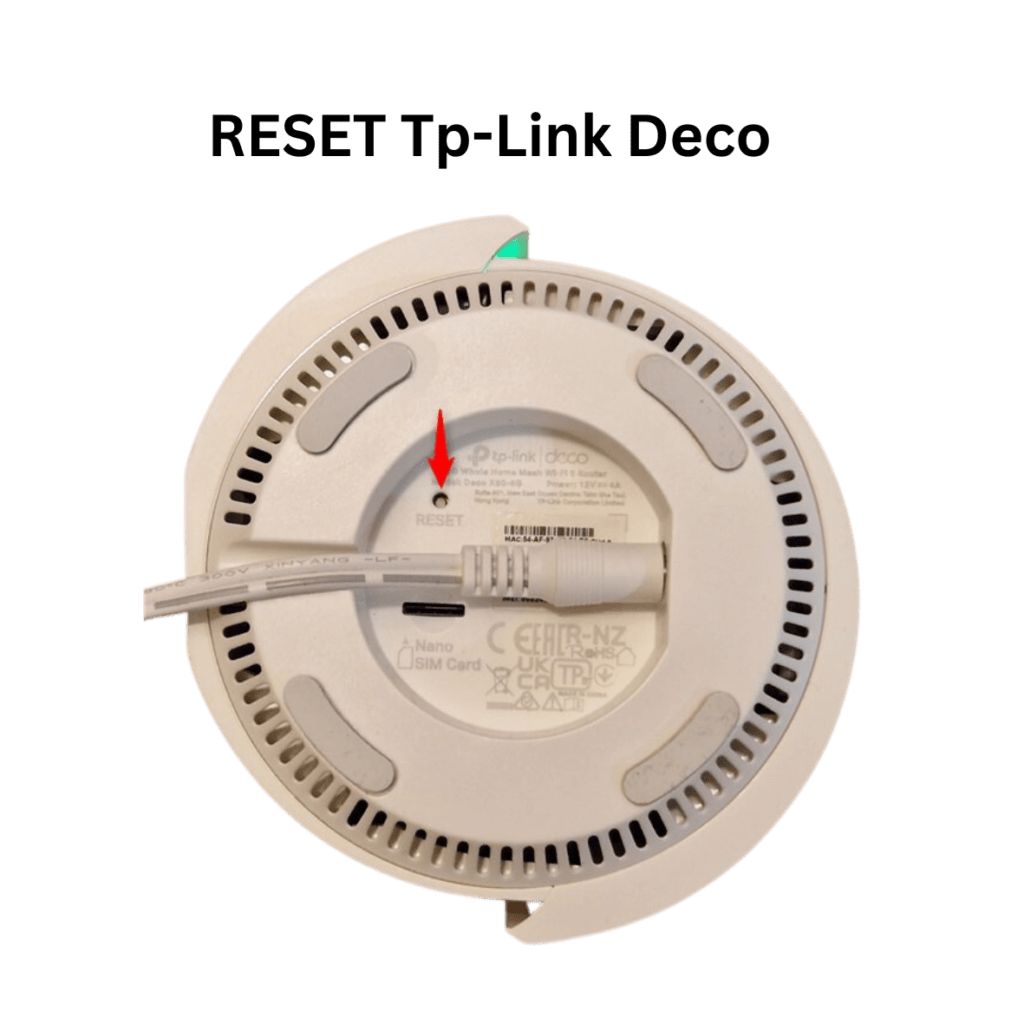
If you encounter any issues with your Set up TP-Link Deco system or want to start fresh, you can perform a Reset. Here’s how:
- Locate the reset button on your Deco unit. It is usually a small, recessed button.
- With a paperclip or a similar object, press and hold the reset button for about 10 seconds until the LED lights on the Deco unit start flashing.
- Release the reset button. The Deco unit will restart and restore the factory settings.
- Wait for the Deco unit to complete the reset process. The LED lights will stabilize once the reset is complete.
- After the reset, you can go through the setup process again to configure your Deco system.
Firmware Update for TP-Link Deco
Keeping your TP-Link Deco firmware up to date ensures that you have the latest features, improvements, and security patches. To update the firmware, follow these steps:
- Open the Deco app on your smartphone or tablet.
- Go to the “More” tab, usually located at the bottom right corner of the app.
- Tap on “Firmware Update” or “Check for Updates.”
- The app will automatically check for the latest firmware version available for your Deco system.
- If a new firmware version is found, tap on the “Update” button.
- Follow the on-screen instructions to initiate the firmware update process.
- Be patient and avoid interrupting the update process to prevent any potential issues.
- Once the firmware update is complete, your Deco system will reboot and apply the new firmware.
Setting Up TP-Link Deco as an Access Point
If you already have a router and want to use TP-Link Deco as an access point to extend your Wi-Fi coverage, here’s how you can do it:
- Connect one end of an Ethernet cable to the LAN port of your main router.
- Connect the other end of the Ethernet cable to the WAN port of the main Deco unit.
- Power on the main Deco unit and wait for it to establish a connection with the router.
- Open the Deco app on your smartphone or tablet.
- Tap on the “+” button to add a new Deco device.
- Follow the on-screen instructions to configure the additional Deco units.
- Choose the “Access Point” option during the setup process.
- Connect the additional Deco units to a power source and position them strategically for optimal coverage.
- Once the setup is complete, your Deco system will function as an access point, extending the Wi-Fi coverage provided by your main router.
Remember, when using TP-Link Deco as an access point, the main router will handle DHCP (Dynamic Host Configuration Protocol) and IP address assignment. The Deco units will act as Wi-Fi extenders, ensuring seamless coverage throughout your home or office.
FAQ
Yes, an active internet connection is required to set up and use TP-Link Deco. The Deco system acts as a Wi-Fi extender or mesh network, and it relies on an existing internet connection provided by your ISP (Internet Service Provider).
Yes, TP-Link Deco is compatible with all internet service providers. Whether you have a cable, DSL, or fiber internet connection, you can easily set up and use TP-Link Deco to extend your Wi-Fi coverage and improve network performance.
The number of Deco units you need depends on the size and layout of your home. As a general rule, one Deco unit can cover approximately 1,500 square feet. For larger homes or areas with multiple floors, you may need to add additional Deco units to ensure seamless coverage in every corner.
Yes, TP-Link Deco provides both wired and wireless connectivity options. Each Deco unit has Ethernet ports, allowing you to connect wired devices such as desktop computers, smart TVs, gaming consoles, and more. This flexibility ensures that all your devices can benefit from the extended Wi-Fi coverage.
You can manage and control your TP-Link Deco network using the Deco app. The app provides a user-friendly interface where you can monitor your network, manage connected devices, set parental controls, and customize various settings. It’s available for both iOS and Android devices, making it convenient to access and control your network from anywhere.
Yes, TP-Link Deco can be used as a standalone router or as an extension to your existing router. If you have a preferred router that you’d like to keep using, you can set up TP-Link Deco in Access Point mode, which allows it to work alongside your existing router and extend the Wi-Fi coverage without interfering with its functionality.

