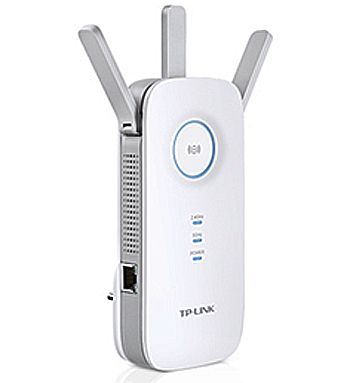
TP-Link RE580D AC1900 Range Extender makes use of 802.11ac Wi-Fi standard to supply dual band Wi-Fi connections with integrate speed up to 1.9Gbps. This splendid speed means you can count on the RE580D to give dependable connections for bandwidth-concentrated tasks, like HD/4K video streaming and large file downloads. The TP-Link RE850D AC1900 Range Extender can use both the 5GHz and 2.4GHz bands to makes single, lightning fast connection by passing on the data through one channel and receiving data on the other. Also beamforming Technology concentrate on the Wi-Fi transfer in the direction of your connected devices, focusing on signal where you need it. Higher ranking Wi-Fi bandwidth utilization boosts the range and provides focused and well organized Wi-Fi connections.
TP-Link RE580D Setup Range Extender with Web Domain
- Firstly need to unbox TP-Link RE5800 AC1900 Range extender.
- Now attach the antennas with extender and set the extender in the right direction.
- Confirm the internet signals, in case the signals are not steady then try to stable it.
- After that unplug the modem and attach the power adapter with extender is at working condition.
- Further connect modem, PC and extender with the Ethernet port.
- Now from your connected device and open any web browser, in the address bar type www.tplinkrepeater.net or 192.168.0.254 and click enter.
- Then you will see the login page here enter the credentials username and password as admin.
- Moreover select your country, time and the language on setup wizard.
- Now it will automatically scan your available list of Wi-Fi in your area.
- Among that list select your main Wi-Fi and enter the password.
- Setup for TP-Link extender is successfully done.
TP-Link RE580D Setup Range Extender with WPS
- Firstly unbox the TP-Link RE580D extender.
- Now attach the antennas with extender and place it close to router.
- Here check your internet signals, in case you find it not steady then fix it.
- After that plug in your extender to power socket.
- Now check power on both the extender and router.
- Now press and hold the WPS button on the extender and in the same time within two minutes press and hold on router also.
- Further it will start catching the settings and the LED also starts blinking.
- In case you notice that the LED is not blinking then place your router somewhere else.
- Finally your TP-Link extender is successfully setup.
TP-Link RE580D Range extender setup via Tether App
- First make sure to plug in your extender and check the LED on extender is on.
- Then from your connected device open any play store and search Tether app and download it.
- After that open the Tether App and enter all the details of extender.
- Now you will find a QR code on the extender scan it.
- Then it will start catching the settings.
- Finally the extender is setup and ready to boost your network.
Setup TP-Link RE580D Range Extender as Access Point Mode
- First from your connected device open any web browser and in the address bar enter www.tplinkrepeater.net or 198.168.0.254.
- Then you the login page will display here enter the username and password as admin and click to login.
- After that click on Advance setting<wireless settings.
- Now search the mode access point and click on it.
- Finally you are successfully enabled Access point mode.
- Apply it and save your settings.
How to login to TP-Link RE580D Range extender?
- Firstly from your connected device open any web browser.
- Then in the address bar enter www.tplinkrepeater.net or 192.168.0.254 and click enter.
- Now you will see the login page here enter default credentials username and password as admin.
- Finally you logged in into settings.
TP-Link RE580D Range Extender Firmware update with Web Domain
- First connect your device and open any web browser and in the address bar enter www.tplinkrepeater.net or 192.168.0.254.
- Now you need to login, use admin as username and password and enter.
- Then go to advanced settings and here check for the firmware update, if any click on it.
- Further it will take around few seconds to update the firmware.
- Finally your Firmware is update and you can also use the updated firmware with the bug fixes.
TP-Link RE580D range extender factory reset
- First thing is to open web browser from connected device.
- Then in the address bar enter www.tplinkrepeater.net or 192.168.0.254.
- Now the login page will appear, here enter the username and password as admin.
- Further click on advanced setting and click on factory reset.
- Now it will take few seconds and your extender worked as default settings.
- So lastly repeat the process for extender setting.
Manual Configuration with an Ethernet Cable
For those who prefer a wired connection, manual configuration is an option:
Connect Your Range Extender
- Use the included Ethernet cable to connect your range extender to your computer.
- Power on your TP-Link RE850D.
Access the Web Interface
Open your web browser and enter “http://Tplinkrepeater.net” into the address bar. Follow the on-screen instructions to complete the setup.
Common Issues and Troubleshooting
Setting up your TP-Link RE850D may not always be smooth sailing. Here are some common issues and how to troubleshoot them:
No Connection After Setup
If your range extender isn’t providing Wi-Fi coverage after setup, try relocating it to a different spot.
Slow Wi-Fi Speed
Slow speeds can result from interference. Ensure there are no electronic devices or thick walls between your extender and router.
Forgotten Password
If you forget your TP-Link RE850D password, you may need to reset it to factory defaults. Consult the user manual for specific instructions.
FAQ
Yes, you can use multiple extenders to cover larger areas, but they should be strategically placed within the Wi-Fi range of your main router.
The default login credentials are usually “admin” for both the username and password.
Absolutely! You can customize your network’s name and password during the setup process or later through the web interface.
Yes, the TP-Link RE850D AC1900 Range Extender is compatible with most router brands. It’s designed to extend the coverage of any Wi-Fi network.
The RE850D offers faster speeds (AC1900) and better coverage compared to many other TP-Link range extenders, making it ideal for larger homes or offices.
The range of the RE850D can vary depending on environmental factors, but it’s designed to cover a significant area. In typical conditions, it can extend Wi-Fi up to 10,000 square feet.
It’s a good practice to regularly check for firmware updates on the TP-Link website and install them to ensure your extender functions optimally.
Yes, you can use multiple RE850D extenders to create a mesh network for seamless coverage in larger areas. Just follow the same setup process for each extender.
Congratulations! You’ve successfully set up your TP-Link RE850D AC1900 Range Extender, and you’re now ready to enjoy uninterrupted Wi-Fi coverage throughout your home or office. Whether you used WPS, a web browser, or an Ethernet cable, you now have the tools to overcome those Wi-Fi dead zones and stay connected effortlessly.
In this guide, we’ve covered the basics of setup and troubleshooting, ensuring that you can make the most of your range extender. Say goodbye to Wi-Fi woes, and hello to reliable, high-speed internet access. Enjoy your extended Wi-Fi coverage with the TP-Link RE850D AC1900 Range Extender!